Value Area (VAH / VAL)
Identify the session’s fair‑value zone and understand how price interacts with it.
The Value Area High (VAH) and Value Area Low (VAL) define the price range where most of the session’s traded volume occurred. This range represents the market’s perceived fair value — the zone where buyers and sellers agreed on price.
When price operates inside the value area, the market is typically balanced. When price moves outside of it, the market may be exploring new value, rejecting extremes or preparing for expansion.
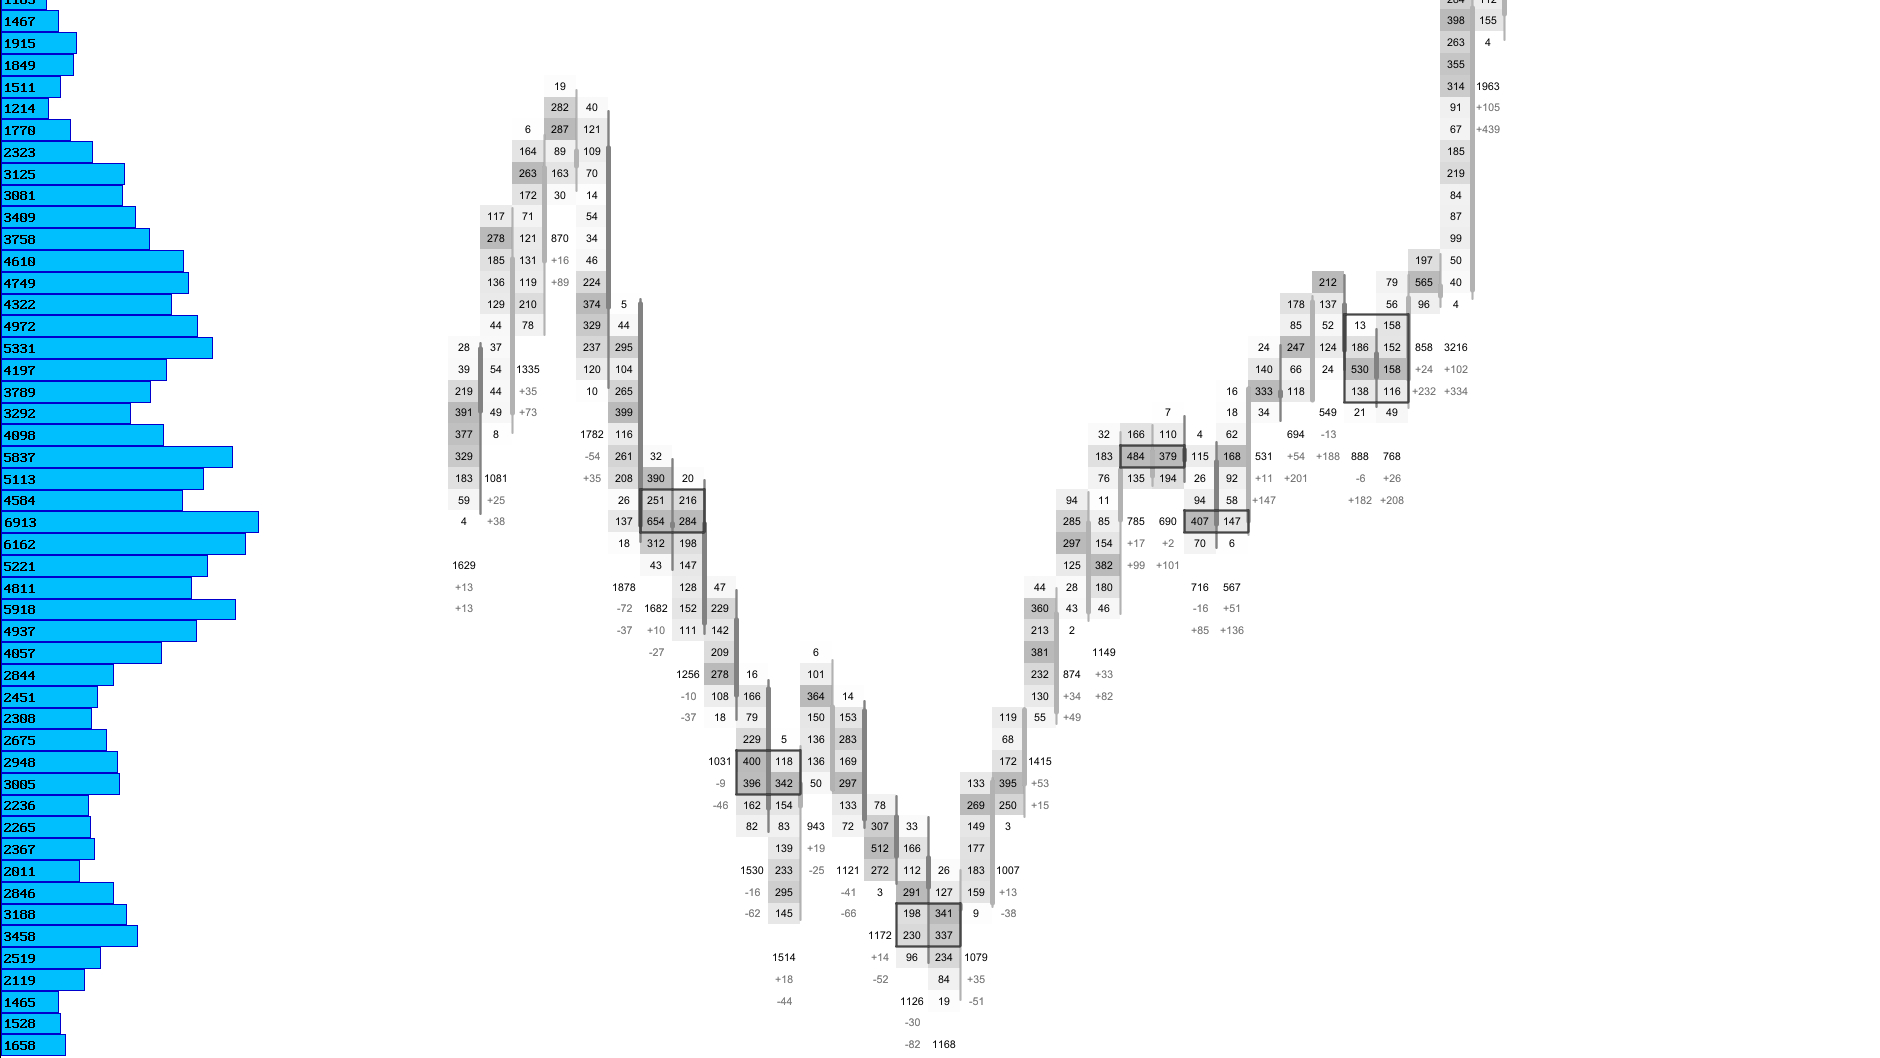
Value Area Range
The price zone where most of the session’s volume was traded.
The value area represents the range where the majority of trading activity occurred during the session. By default, this is set to 70% of total traded volume, centered around the session’s most active price level.
This range highlights where buyers and sellers agreed on value. When price remains inside the value area, the market is typically balanced. When price moves outside of it, the market may be exploring new value or rejecting previous areas.
Value Area Concepts
| Concept | Description |
|---|---|
| Value Area High (VAH) | The upper boundary of the fair‑value zone. |
| Value Area Low (VAL) | The lower boundary of the fair‑value zone. |
| Accepted Price Range | The zone where the market spent most of its time and volume. |
| Balance Structure | A clear view of where buyers and sellers agreed on value. |
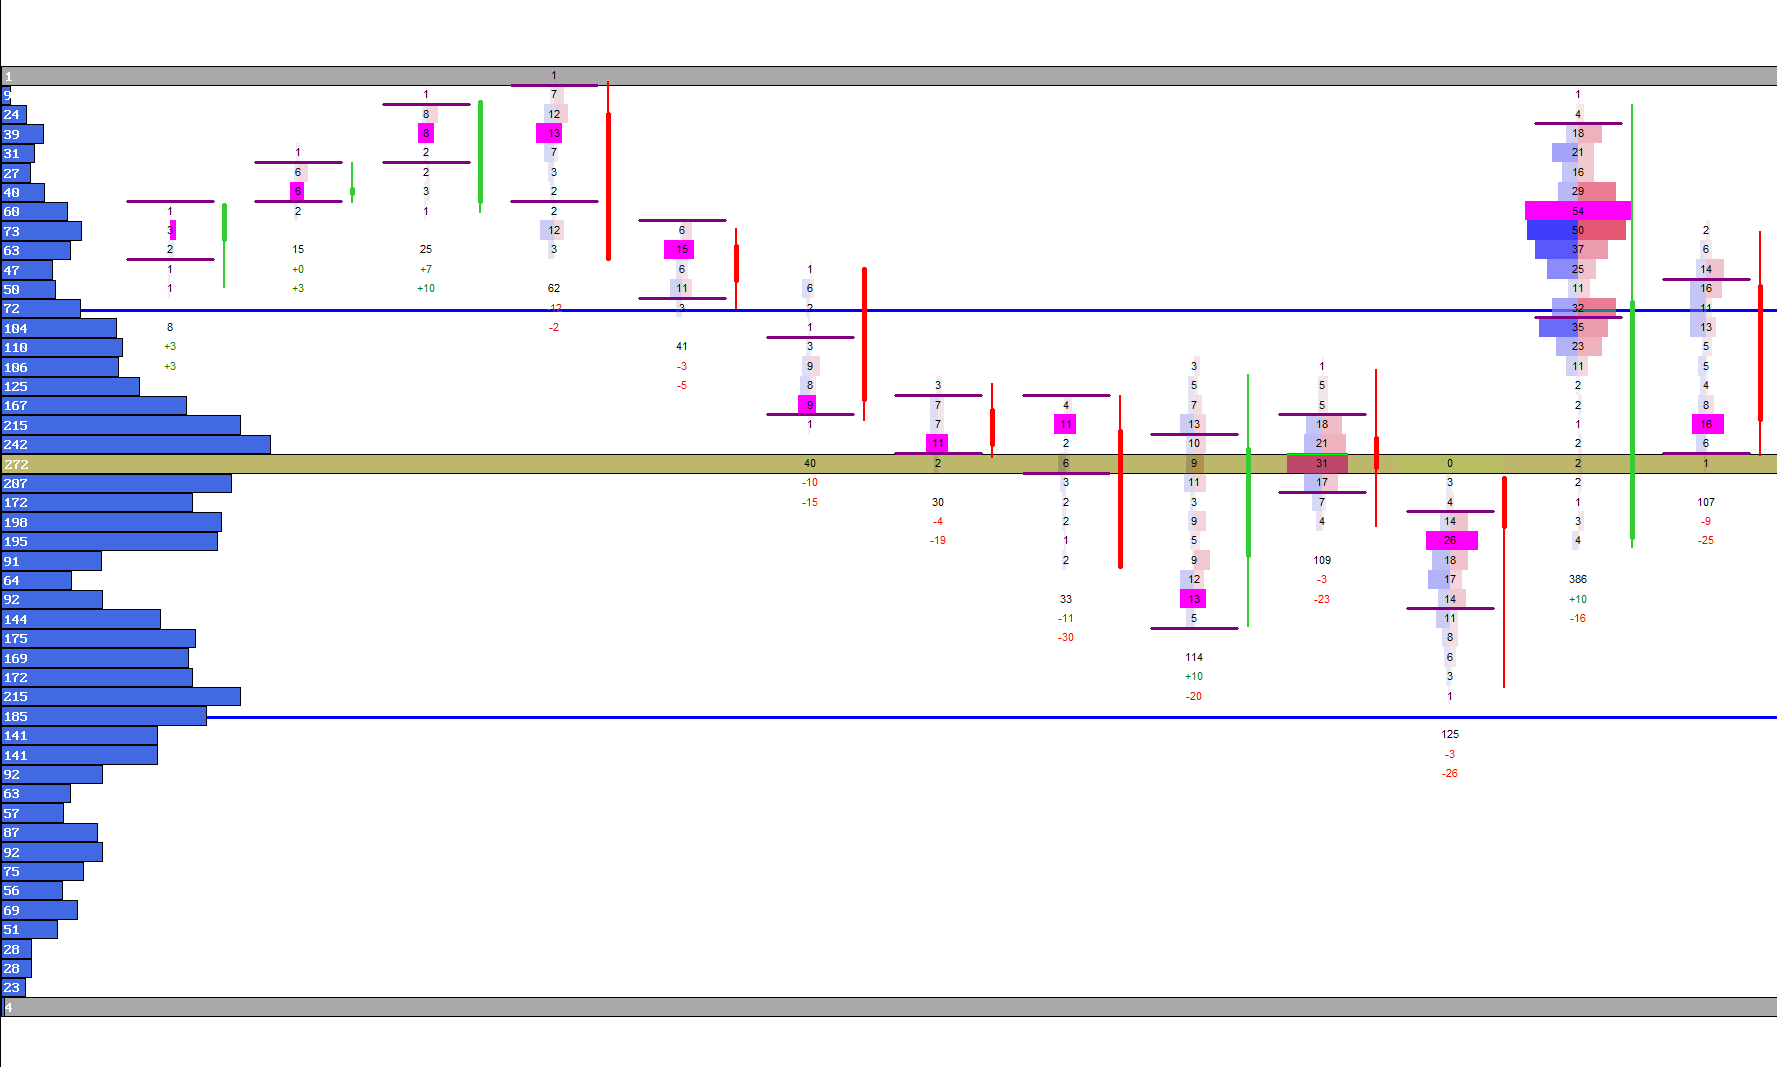
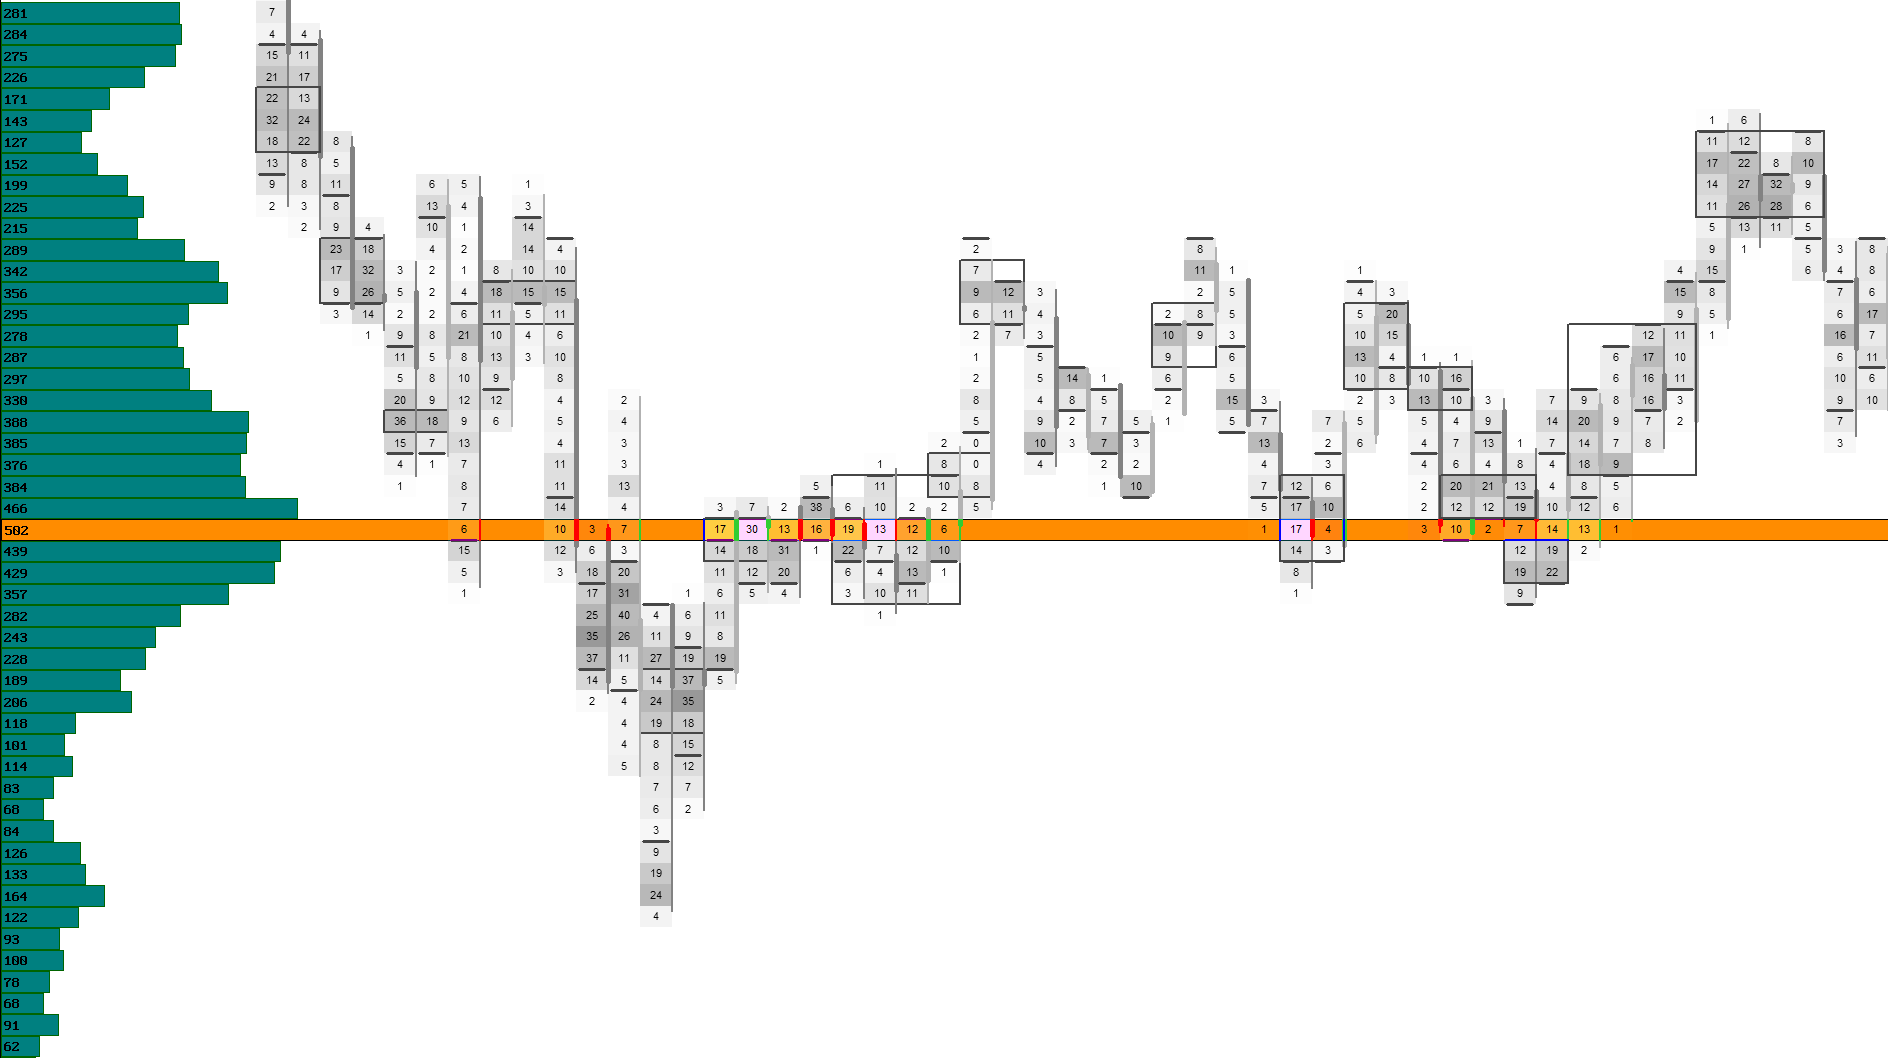
Visual Example: Value Area Range
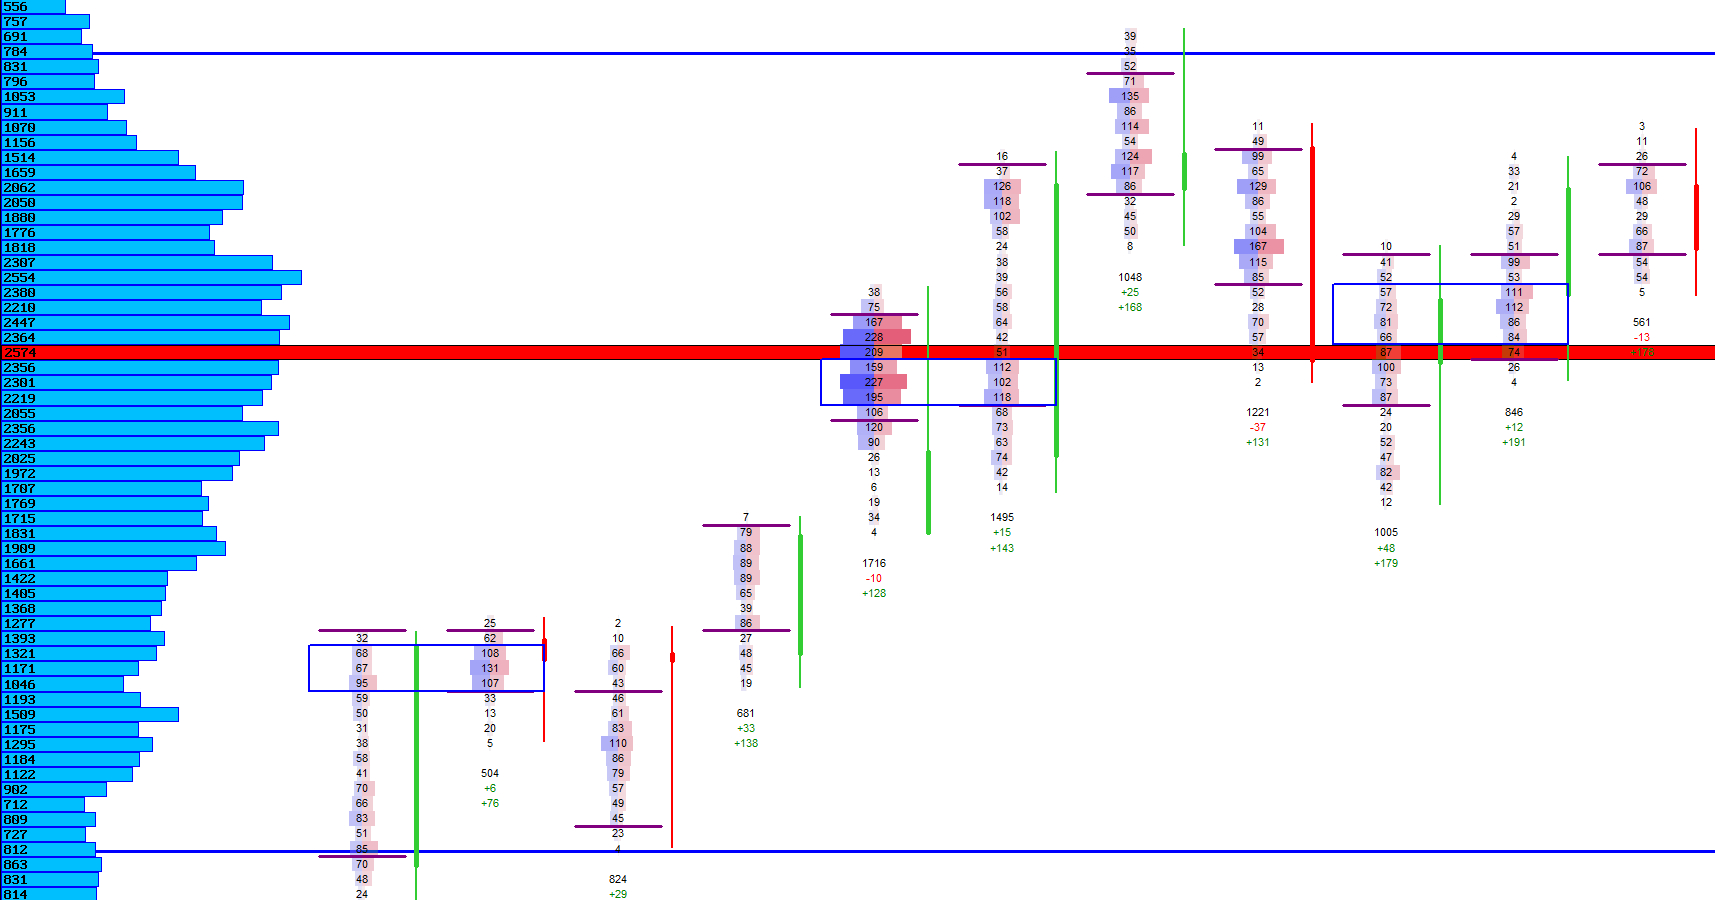
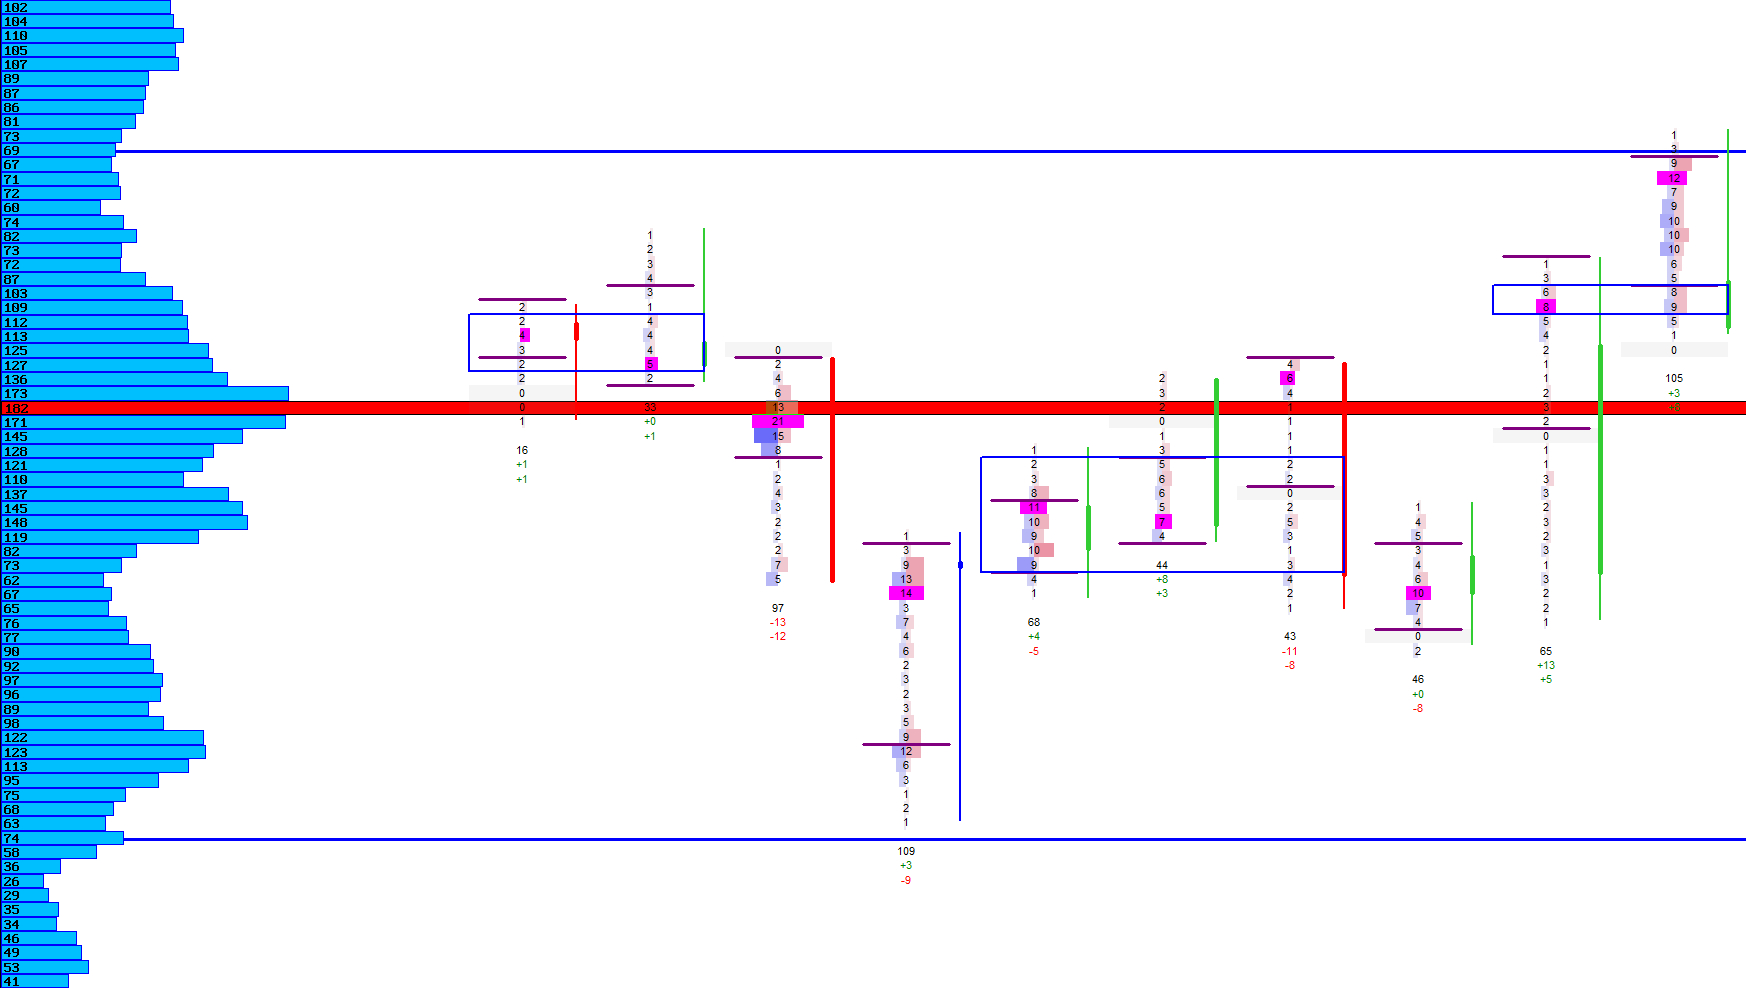
VAH & VAL Lines
Clear boundaries marking the upper and lower limits of fair value.
VAH marks the upper boundary of the value area, while VAL marks the lower boundary. These levels act as dynamic support and resistance zones. Price often reacts strongly when approaching or leaving these boundaries.
The lines are drawn across the entire chart and remain aligned with the footprint’s price axis, ensuring a clean and consistent visual structure.
VAH / VAL Modes
| Mode | Description |
|---|---|
| Standard VAH / VAL | Draws the upper and lower boundaries of the value area across the session. |
| Dynamic Fair‑Value Lines | Updates VAH and VAL as new volume accumulates during live trading. |
| Minimalist Mode | Draws thin, unobtrusive lines for a clean, low‑noise layout. |
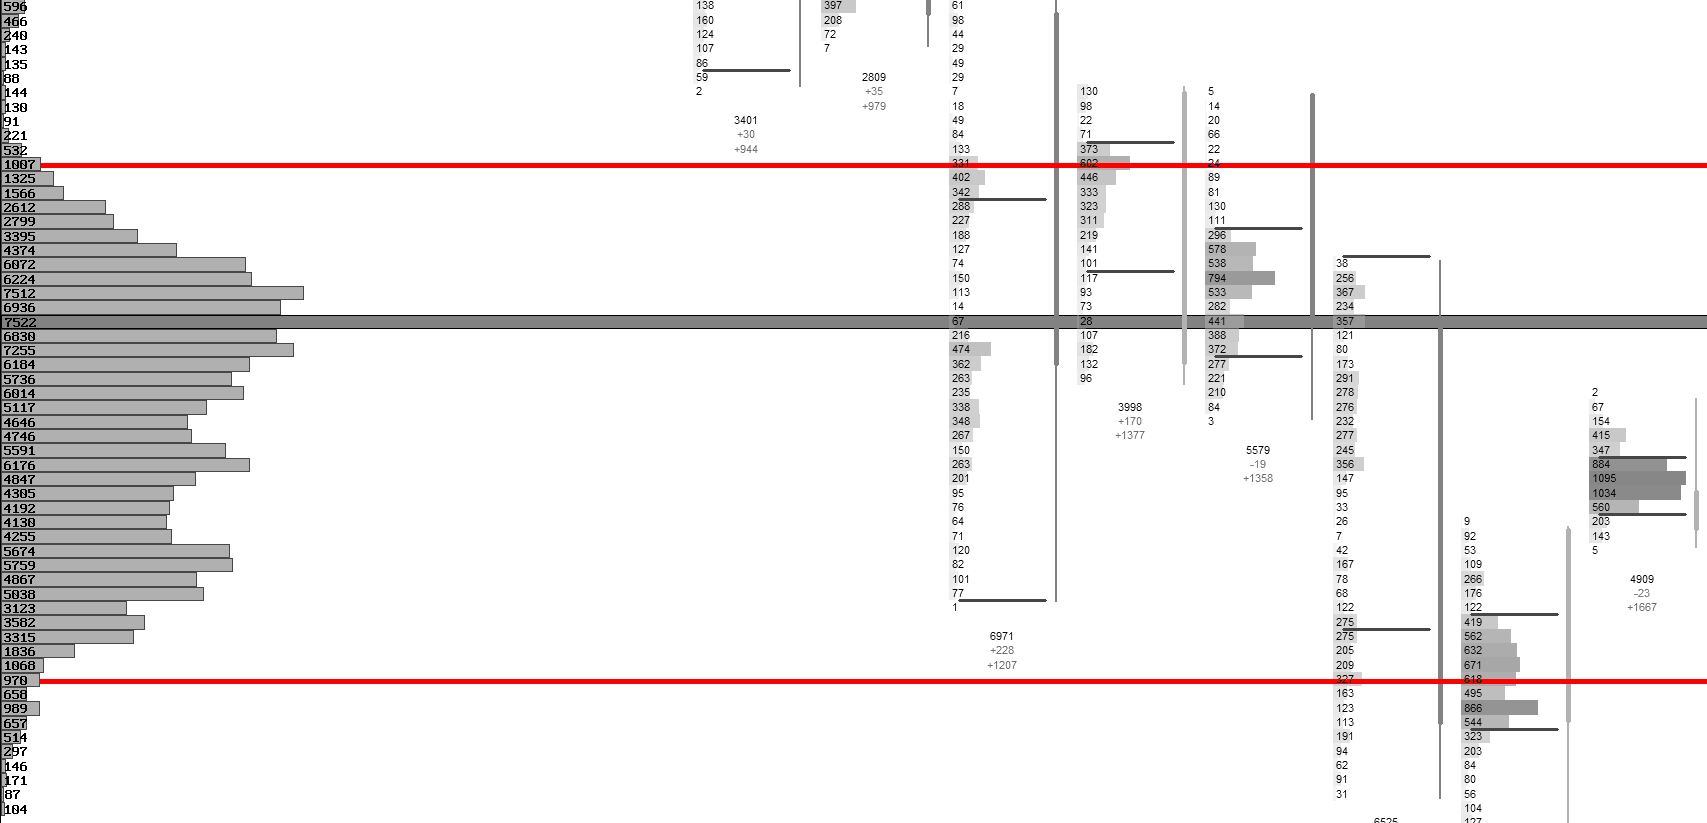
Visual Example: VAH & VAL Lines
Interpreting Value Areas
Understand how price interacts with fair‑value zones.
When price trades inside the value area, the market is typically balanced. Buyers and sellers agree on value, and price often oscillates within this zone.
When price breaks above VAH, it may signal bullish initiative buying — the market is exploring higher prices to find new value. When price breaks below VAL, it may signal bearish initiative selling.
Rejections at VAH or VAL often indicate strong opposing interest and can mark turning points or continuation setups depending on context.
Next Chapters
Continue exploring the core modules of Footprint‑Secrets.